Tag: DD-WRT
Asus WL-520GU as a Wireless Bridge
by Groove on Mar.30, 2010, under Mods

The other day i was thinking about how much hardware that i have that’s hacked or modified in some way or another to make it do something other than it was really intended to do. I’m bored, so occasionally I’ll whip up a guide on how I did this stuff so that when my techie friends ask ‘whoa, how’d you do that?’ i can sarcastically reply ‘dude, don’t you read my blog?’
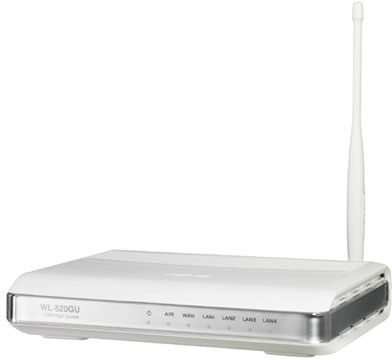
The first entry, since I just did it today, is about modifying the WL-520GU router from Asus.
Backstory: So, i needed to setup a wireless bridge.
I could have bought a device designed for precisely that purpose – but where would the fun be in that?
So, i grabbed an Asus WL-520GU for $50 – $10 MIR. Flashed it to DD-WRT, and then setup the bridge. DD-WRT has a lot of very cool features that I’m just learning about since I use Tomato on my main router – but that’s an article for another day perhaps. This guide focuses on flashing DD-WRT and setting it up as a wireless bridge (so that you can connect wired peripherals in another room to your main wireless router/network). As far as i know, the main router doesn’t have to be any specific model or firmware – just setup and working.
I’ll divide the process up into two guides: flashing DD-WRT, and setting up the bridge.
Part I: Flashing DD-WRT to the WL-520GU
Before i flashed DD-WRT, I read about 10 different guides of varying age, so here’s a quick walk-thru of how i did it.
Step 1. Download the latest DD-WRT mini_asus.trx from Here – in my case it was dd-wrt.v24_mini_asus.trx.
Step2. Download the Asus Utilties from Here . Unzip and install.
Step3. Assign a static IP to your network card, in the 192.168.1.whatever range. I suggest 192.168.1.10.
Step4. Hook up your WL-520GU – connect a LAN cable from your computer to one of the LAN ports on the new router. Disable any other network interfaces on your computer other than that LAN connection to the router.
Step5. Open up IE and type in 192.168.1.1 – you should be prompted for a PW from your WL-520Gu. ( this step isn’t 100% necessary – we’re just checking to see that the comp sees the router on the LAN). Hit ‘Cancel’ to not login to the router – we just want to know its there.
Step6. Preping to flash: Unplug the power cable from the router. Open up the Asus Utilties and run the Asus Firmware Restoration Utility. If you’re running Vista or 7, make sure to run it as an Administrator (right click on the icon and hit ‘Run as Administrator). Hit Browse and select the file dd-wrt.v24_mini_asus.trx that you downloaded in Step1.
Step7. The Flash: Hold down the reset button (the recessed black one on the back – you’ll need a pen or something pokey) and plug in the power cable to your WL-520GU. Keep holding the reset button until the power LED starts to flash. Release the reset button, go back to your Asus Firmware Restoration Utility and hit ‘Upload’. Hopefully it’ll flash DD-WRT and everything will go OK.
Step8. Once the firmware has flashed, the Firmware Restoration Tool will wait for the device to reboot. I gave it about a minute and a half and then unplugged/replugged the router. Open up IE, type in the address of the router (192.168.1.1) and viola – you should be greeted by DD-WRT!
Step9. 30-30-30 reset: I’m not sure if this was 100% necessary, but after i flashed DD-WRT i reset the router. You do so by holding that black reset switch on the back for 30 seconds – then unplugging it for 30 seconds – then plugging it back in while holding the reset button again for 30 seconds. I then unplugged it again and plugged it back in.
Part II: Setting up the Wireless Bridge
Step1. Avoiding a conflict with your main router: Open IE and go to the DD-WRT setup page @ 192.168.1.1. It’ll force you to assign a new username/pw. Go ahead and set whatever you’d like. Now navigate to Setup/basic setup/network setup/router IP – and change the router IP from its current setting of 192.168.1.1 – to 192.168.1.2. This is to make sure that if your main router uses 192.168.1.1 (like mine does) they won’t conflict. Hit Apply.
Step2. Change the Wireless settings: IE will be waiting for the router to reset on 192.168.1.1 – but now its @ 192.168.1.2 – so change the address in IE to 192.168.1.2 and you’re back in the DD-WRT setup page. Navigate to Wireless/basic settings/. Set Wireless mode: Client bridge. The rest of the settings will be the same as our main router. So if your main routers SSID is ‘ateyourbaby’ – that’s what you’ll set here. Check to see that ‘network configuration’ is set to bridged. Hit ‘Apply’.
Step3. Navigate to ‘Wireless Security’ and once again duplicate the settings on your main router. Same SSID, same passphrase, etc. Hit Apply.
Step4. Re-enable DHCP on your computer. Give it a minute or two, but at this point the WL-520GU should be connected to your main WLAN. Your PC should get an IP through the WL-520GU from your main router and be able to surf. Some people have reported that they have to set a static IP on machines behind the bridge, but i didn’t have this problem.
Voila! You have hacked your $40 router to be a wireless bridge!
P.S. Vegas is nice this time of year
P.P.S. If i have any blatant errors here feel free to point them out – i wrote this guide by memory so some things might be a little … off.